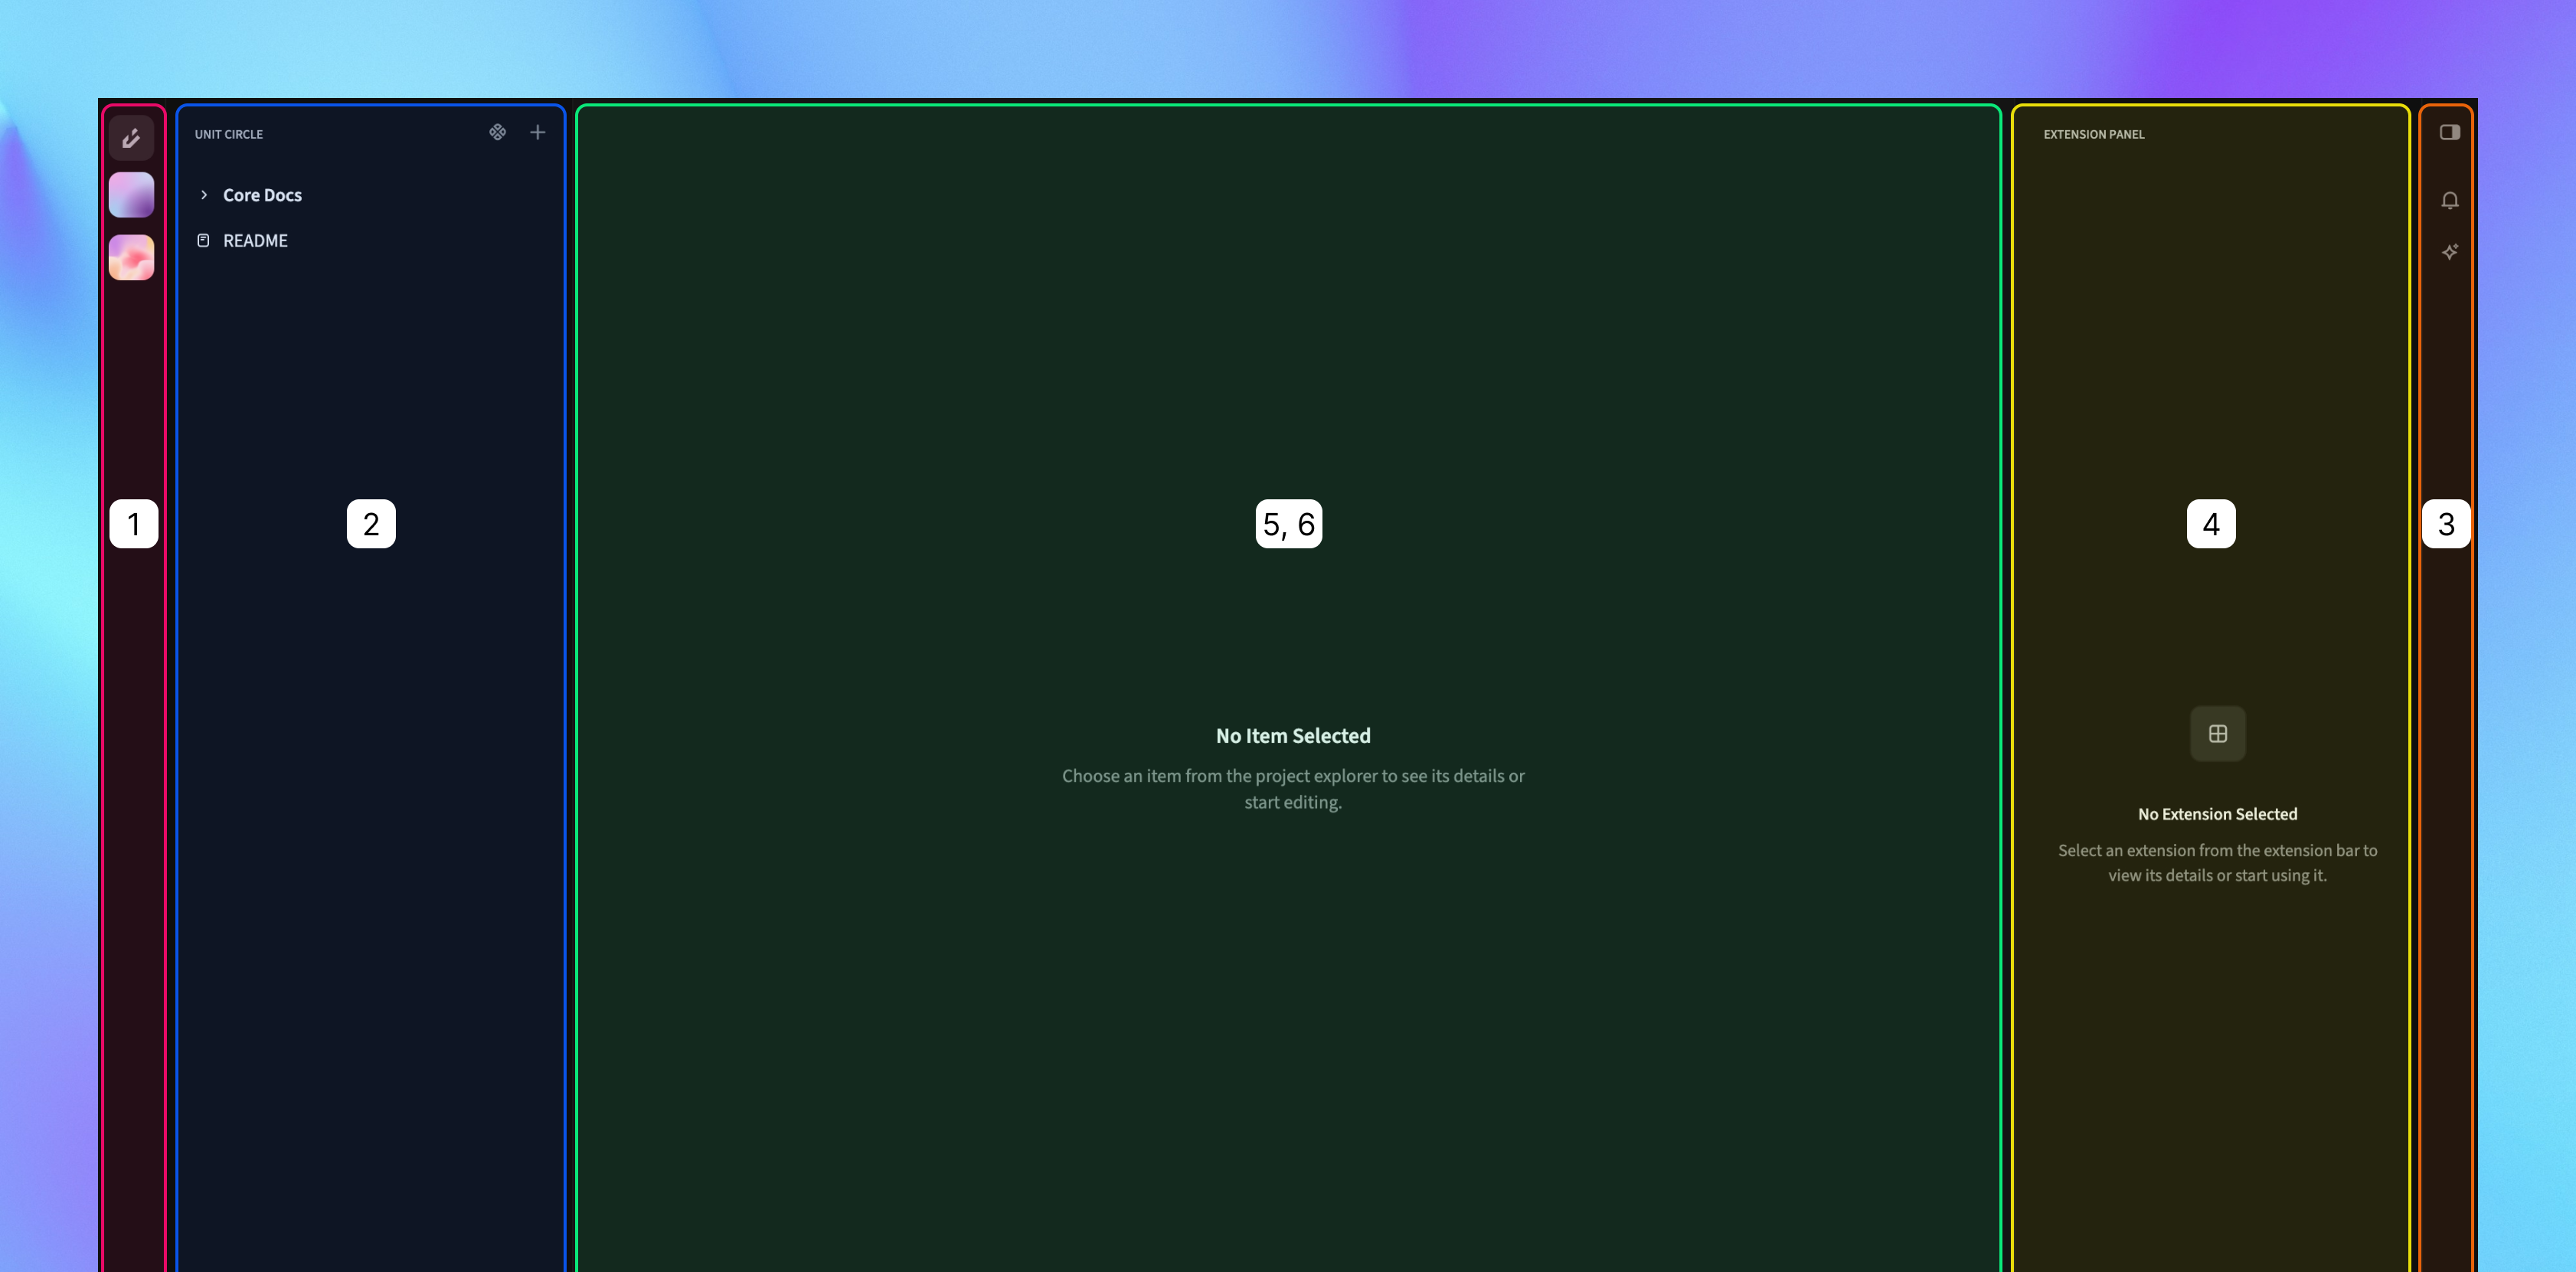
- Action panel.
- Project panel.
- Extension selector panel.
- Extension panel.
- Document editor view.
- Code to diagram view.
Action Panel
The Action Panel serves as the central hub of the application. It allows you to navigate almost every area of the platform, giving you quick access to essential features and tools. The action panel contains buttons to:- Open the profile menu.
- Open the organization selector.
- Open the project selector. (visible only when an organization is selected)
- Toggle the project panel. (visible only when a project is selected)
The action panel is always visible.
Project Panel
Once you open a project, the Project Panel helps you navigate through its folders and documents, making it easy to access and organize your work.Extension Selector Panel
The Extension Selector Panel becomes visible only when a project is open. It provides access to all supported built-in extensions available for your account, allowing you to enhance your project with additional features. You can toggle this panel to show or hide it.Extension Panel
The extension panel displays and manages extensions such as,- Notification panel.
- AI Copilot panel.
- Other supported extensions.
Document Editor View
The Document Editor View is the primary workspace for editing your documents, providing all the tools you need to create and modify content. The document editor has three main components:- Status bar.
- Editor area.
- Table of contents button.
Status Bar
The status bar shows important information about your current document:- Breadcrumbs showing your document’s location.
- Editor options menu.
Editor Options Menu
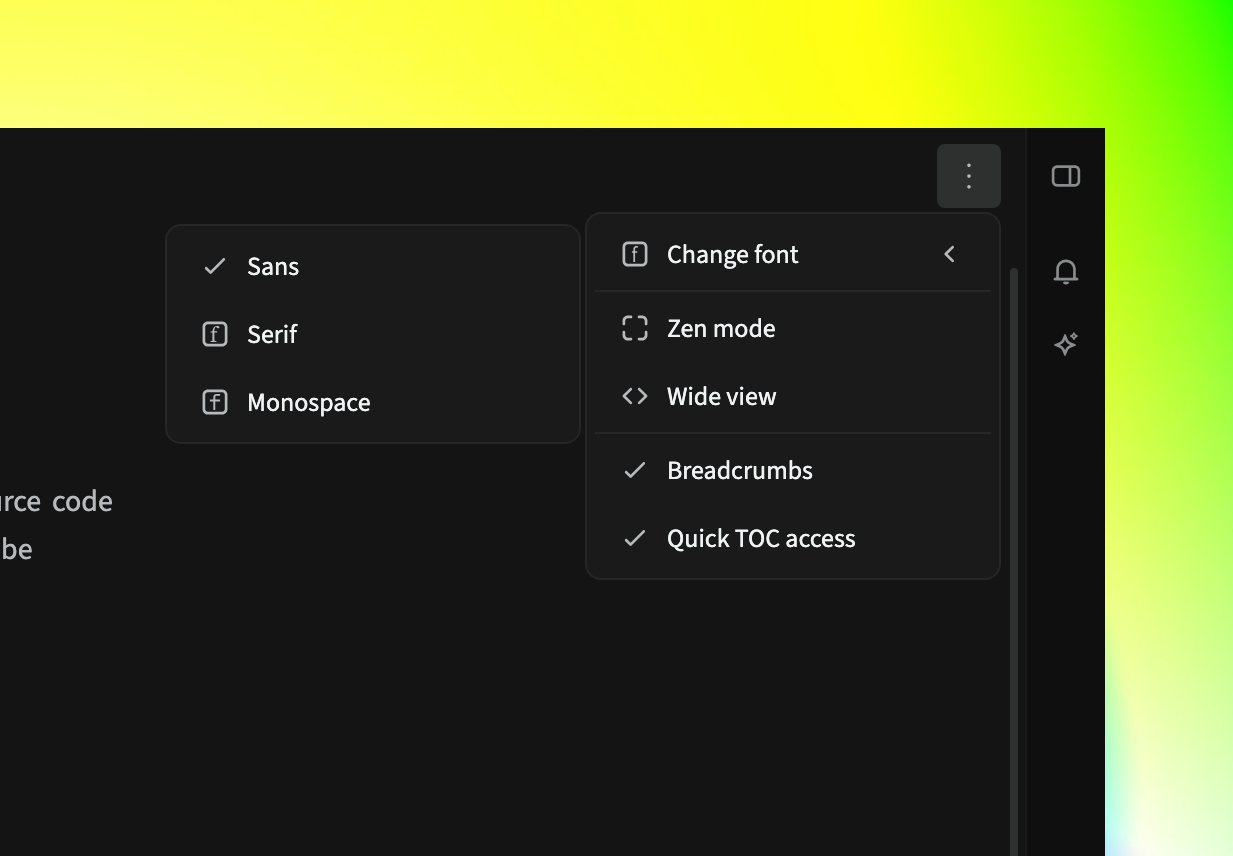
- Change font: Switch between Sans (default), Serif, or Mono fonts.
- Zen mode: Hide all panels for distraction-free writing.
- Editor width: Toggle between narrow and wide views.
- Show/hide breadcrumbs: Control breadcrumb visibility.
- Quick TOC access: Enable to show the table of contents on hover. (or disable to require clicks)
Your document settings apply to all documents, creating a consistent experience throughout the application.
Editor Area
In this editor area, you can write and format your document content. Use the Block Menu to insert and organize different types of blocks, and the Bubble Menu to apply formatting options directly to your text.Table of Contents Button
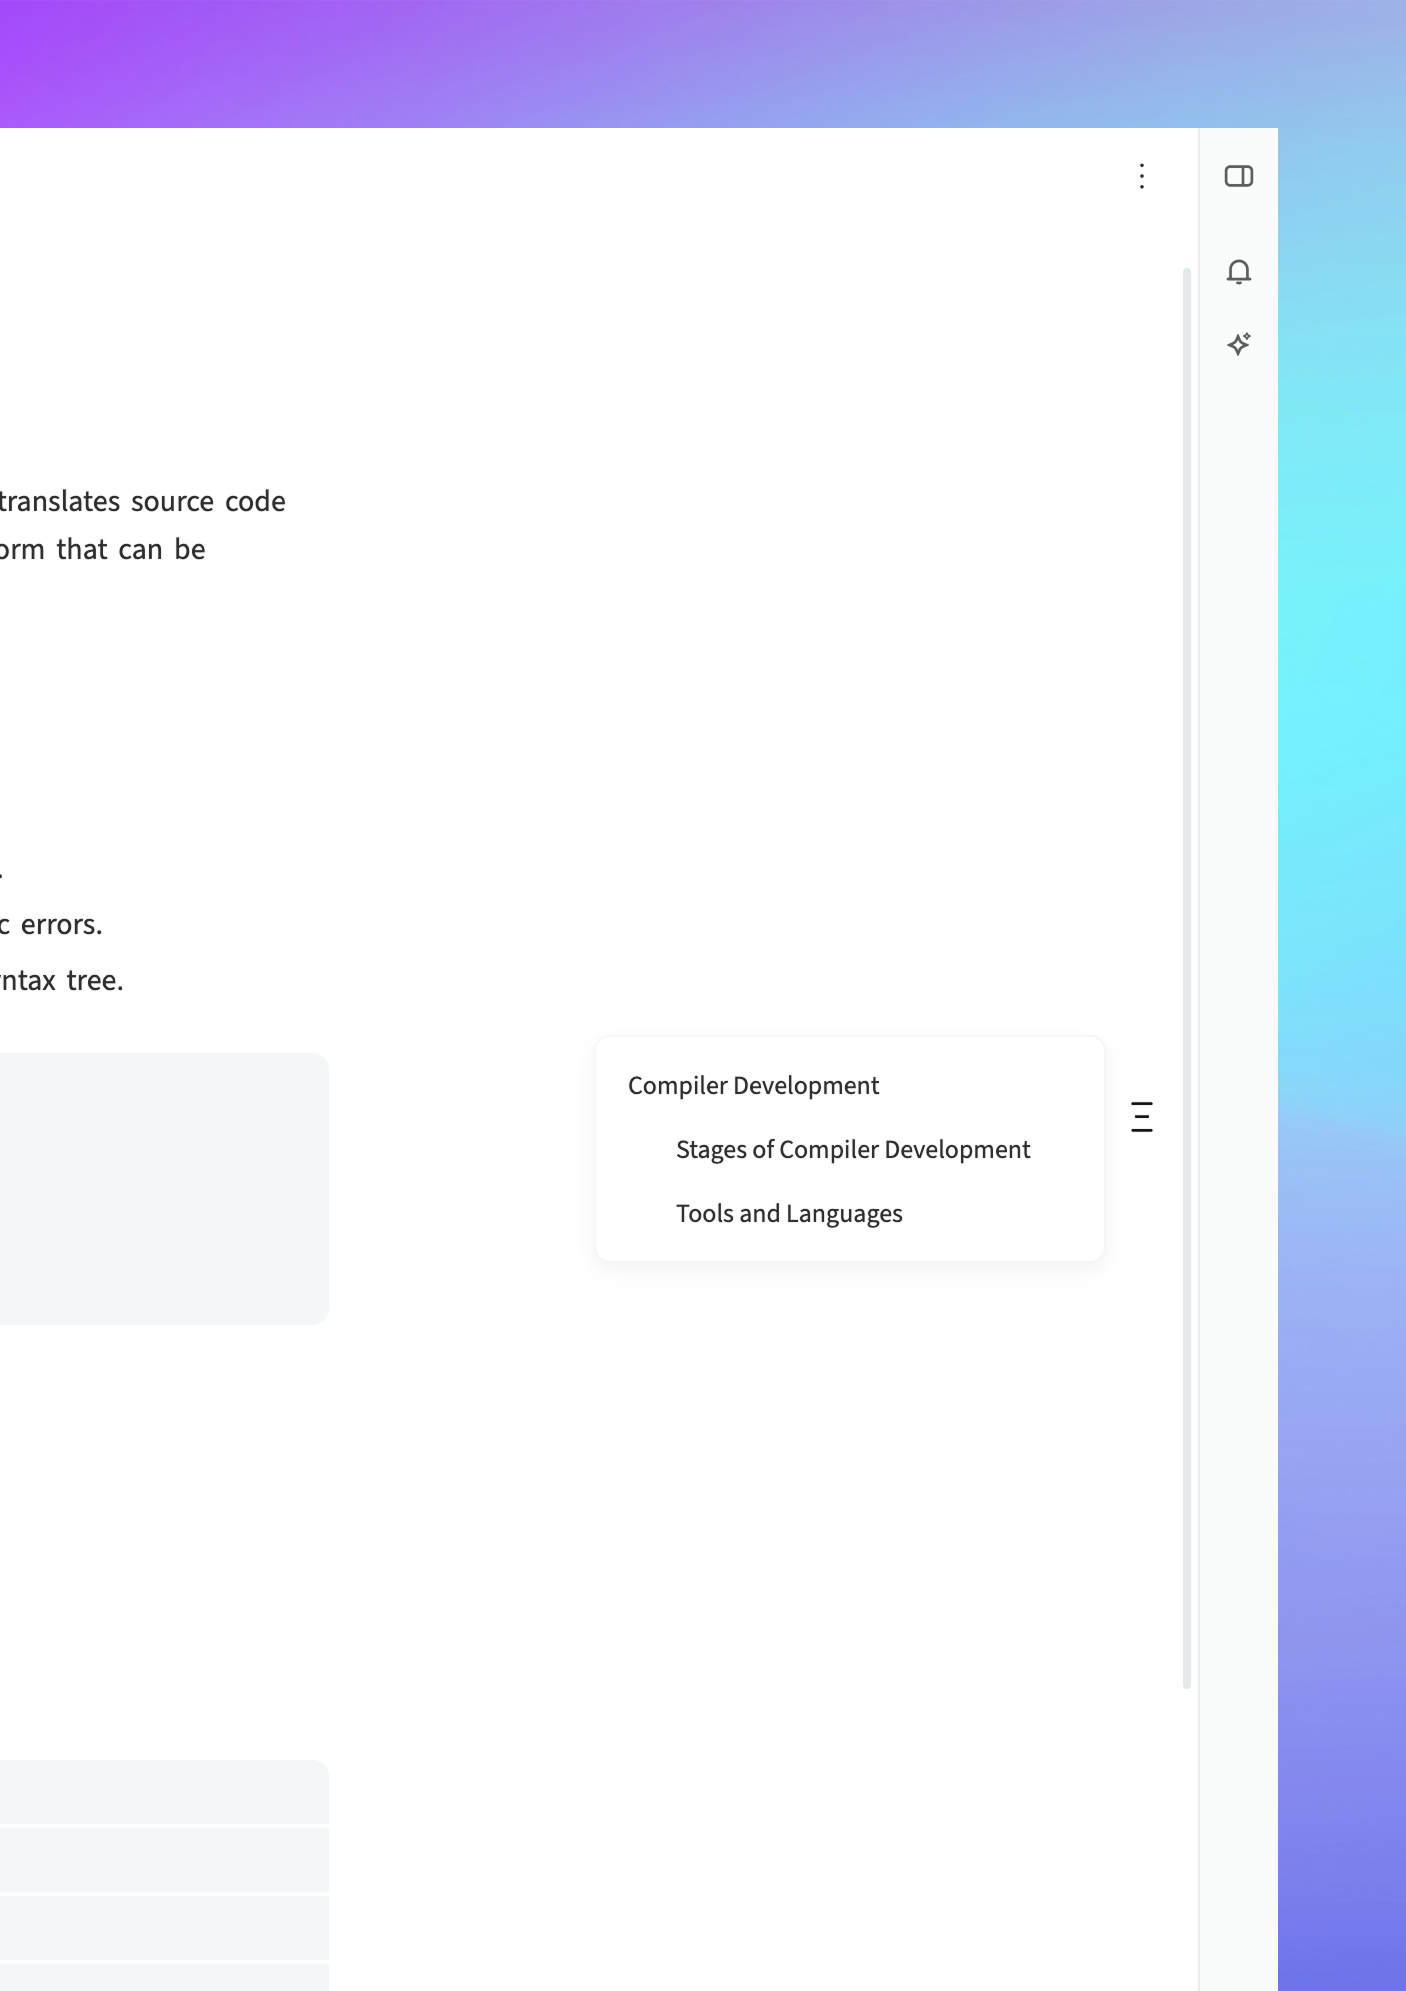
- Click or hover over the TOC button (depending on your settings).
- Navigate through the document by clicking on any heading in the menu.
Code to Diagram View
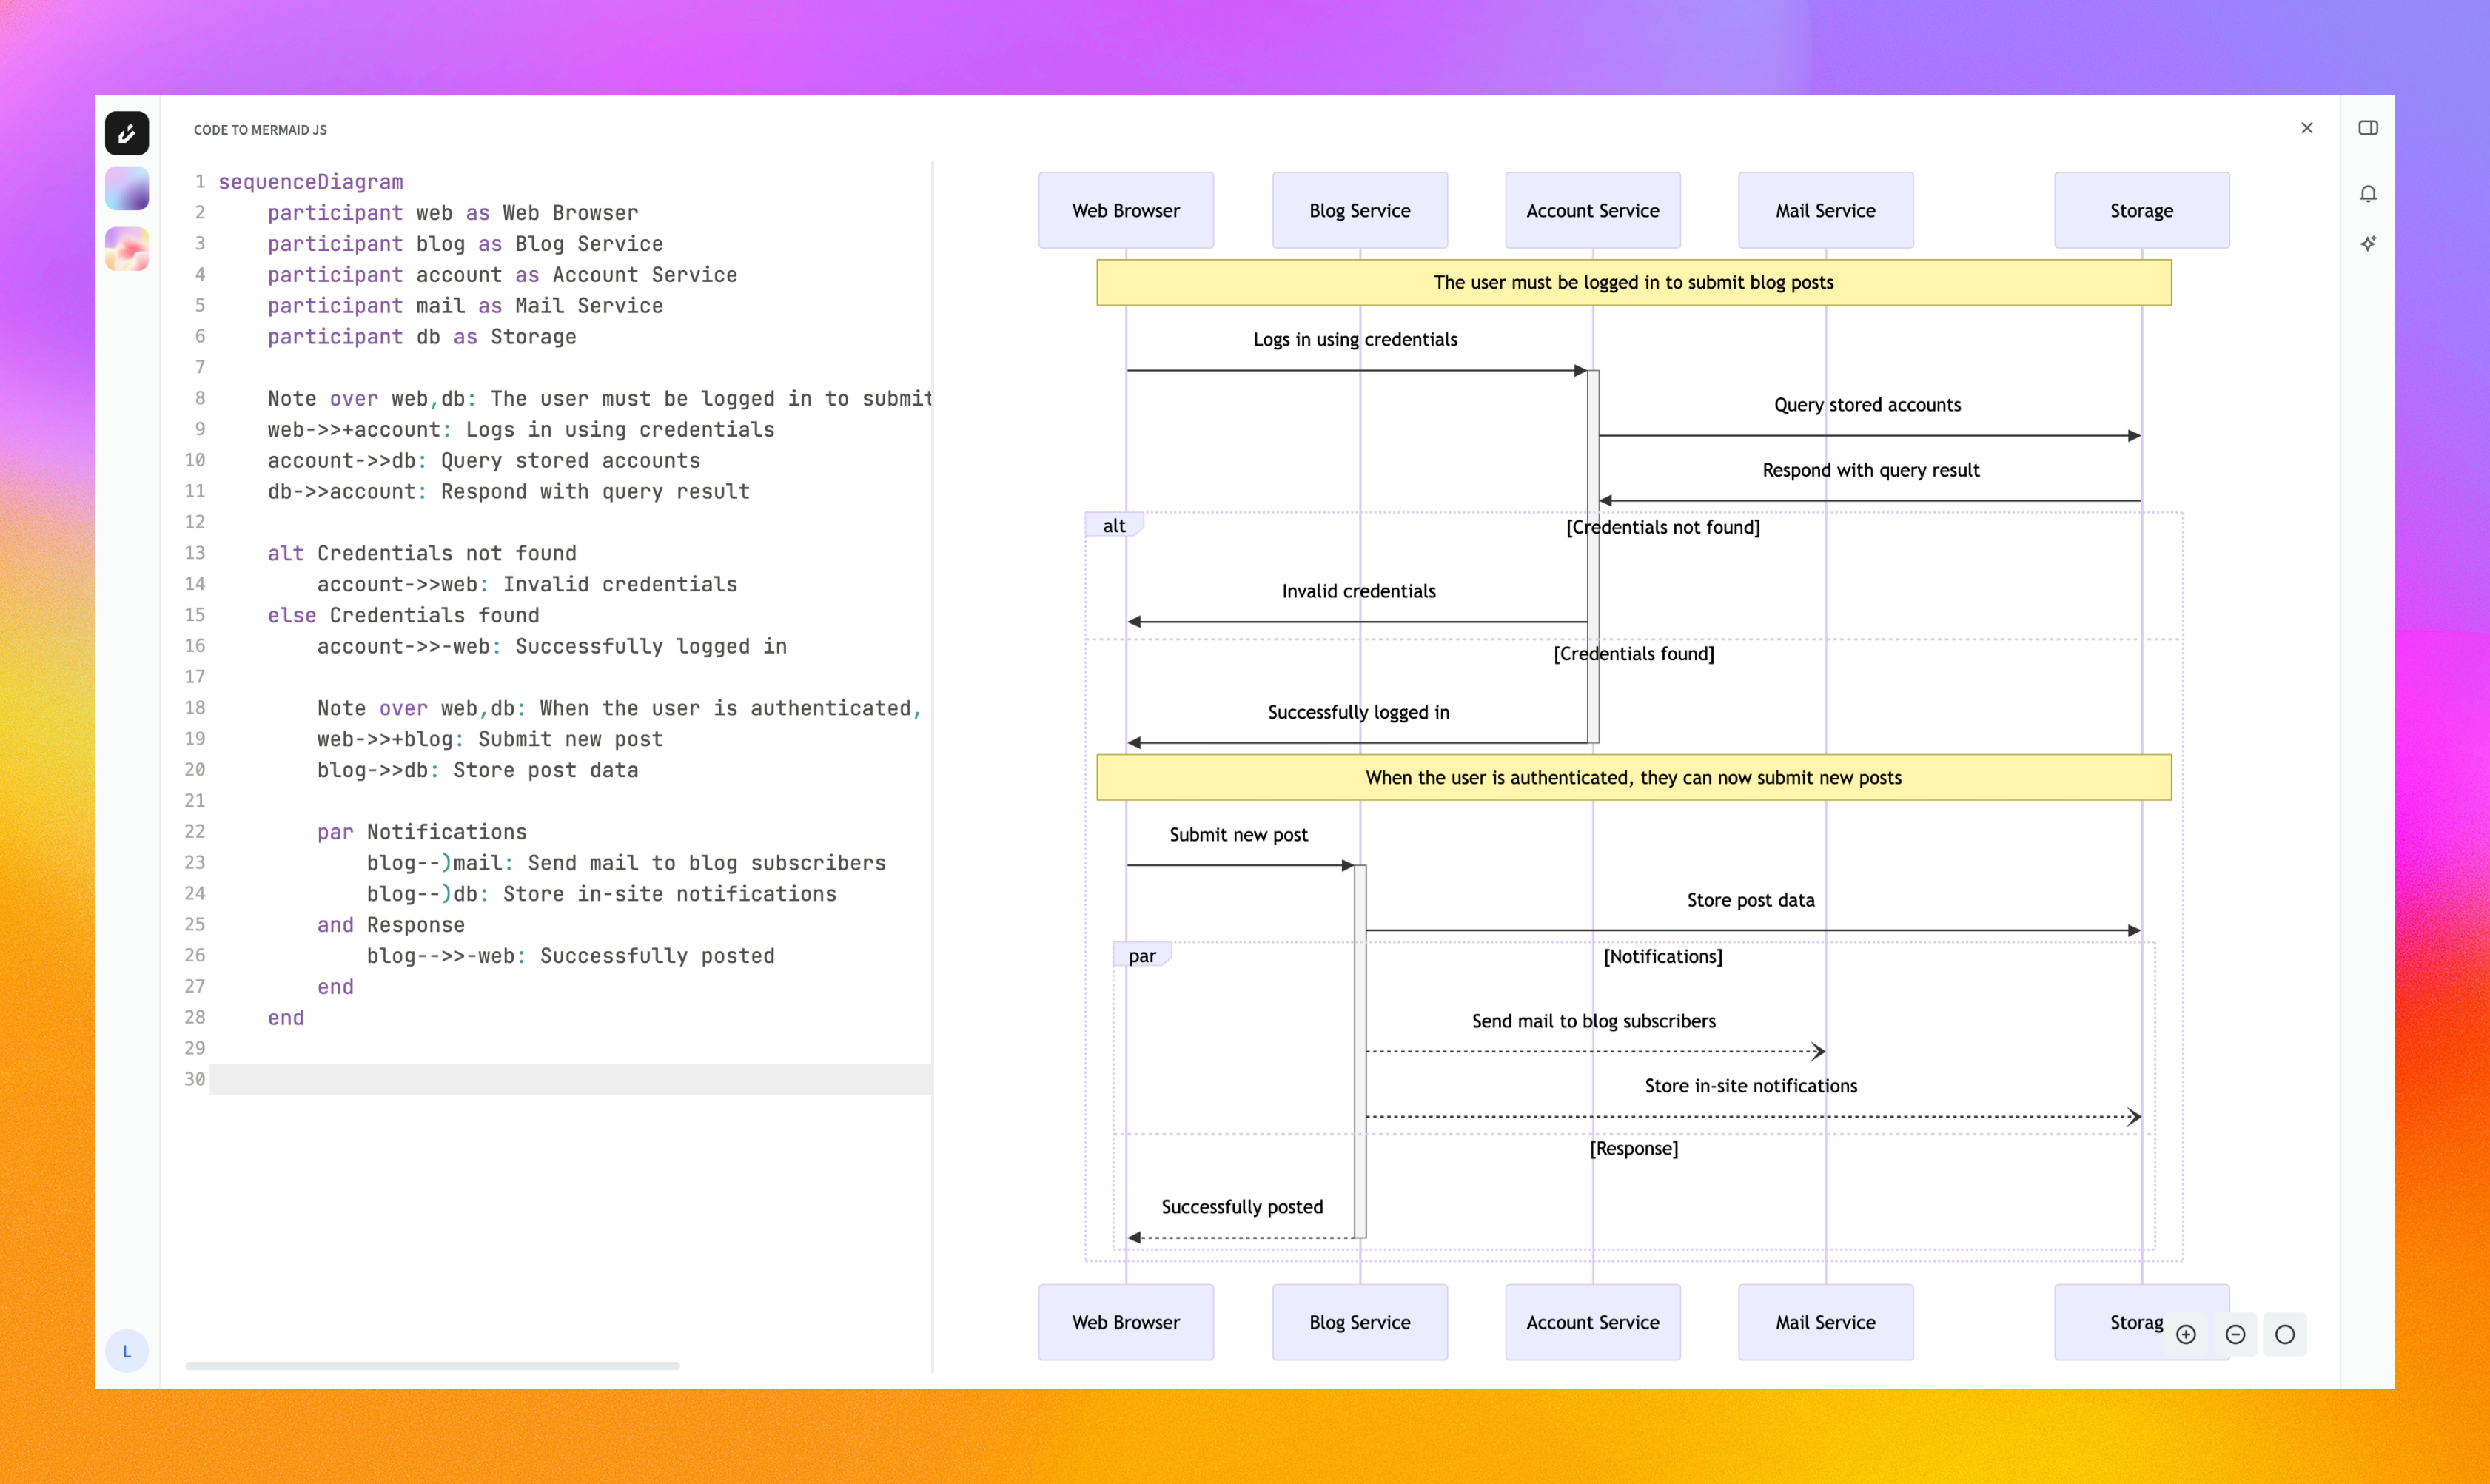
- Click the Edit button on a diagram block.
- Use the Code Editor Panel to write or modify your diagram code.
- View your diagram as it renders instantly in the Preview Panel.
- Click
+to zoom in. - Click
–to zoom out. - Click the Reset button to return to the default view.
You can create complex flowcharts, sequence diagrams, and more using supported diagram syntaxes.